Start your morning with a Dutch Baby: A Fluffy, Sweet Start to the Day that’s as delightful as it is simple to make.
Table of Contents
Introduction
Mornings are often defined by the rituals we choose to begin the day, and for many, breakfast serves as the perfect canvas for creativity and comfort. Among the array of breakfast delights, one dish stands out with its puffed grandeur and sweet simplicity: the Dutch Baby. This oven-baked marvel, part pancake and part soufflé, has earned its place at the breakfast table for its versatility, ease of preparation, and ability to impress with minimal effort.
Whether adorned with powdered sugar, topped with fresh fruit, or served with a dollop of whipped cream, the Dutch Baby transforms an ordinary morning into an extraordinary culinary experience. But what exactly is this delectable creation, and what makes it such a perfect choice for breakfast enthusiasts?
What is a Dutch Baby and Why It’s Perfect for Breakfast
A Dutch Baby is a large, airy pancake that is baked in the oven rather than cooked on a stovetop. Resembling a popover or a Yorkshire pudding, this dish is characterized by its golden, crisp edges and a soft, custard-like center. Made with a simple batter of eggs, milk, flour, and butter, the Dutch Baby puffs dramatically in the oven, creating an impressive presentation that belies its straightforward preparation.
Its appeal lies in its adaptability. The Dutch Baby can swing between sweet and savory flavors with ease, making it a versatile addition to any breakfast menu. Sweet versions are often garnished with powdered sugar, syrup, or fruit, while savory renditions might include cheese, herbs, or smoked salmon.
What makes the Dutch Baby truly exceptional for breakfast is its quick preparation time and crowd-pleasing nature. Unlike traditional pancakes that require flipping and constant attention, the Dutch Baby allows for hands-off cooking. Once the batter is poured into a preheated pan, the oven takes over, giving you time to sip your morning coffee or prepare accompaniments.
The History and Origins of the Dutch Baby
The origins of the Dutch Baby are as intriguing as its name. Despite what its title might suggest, the Dutch Baby has no direct connection to the Netherlands. The dish is believed to have its roots in Germany, derived from a German pancake known as pfannkuchen. Immigrants brought this culinary tradition to America, where it evolved into the version we know today.
The term “Dutch” is thought to be a corruption of “Deutsch,” the German word for “German.” The “Baby” part of the name is said to refer to the smaller, individual versions of this dish that were popularized in American households during the early 20th century.
The Dutch Baby gained widespread recognition in the United States thanks to Victor Manca, the owner of Manca’s Café in Seattle, who trademarked the dish in the early 1900s. It quickly became a signature offering at his restaurant, celebrated for its dramatic puff and delightful taste.
Today, the Dutch Baby remains a beloved breakfast and brunch staple, celebrated not only for its rich history but also for its ability to adapt to contemporary tastes and dietary preferences. Whether enjoyed in its classic form or reinvented with modern twists, the Dutch Baby continues to charm palates around the globe.
Ingredients Overview
Crafting a Dutch Baby requires a handful of simple yet essential ingredients, each playing a vital role in achieving the dish’s signature puff, golden hue, and delightful flavor. The magic lies not just in the combination but also in the quality of these ingredients. Understanding their purpose helps elevate your Dutch Baby from good to extraordinary.
Essential Ingredients for a Classic Dutch Baby
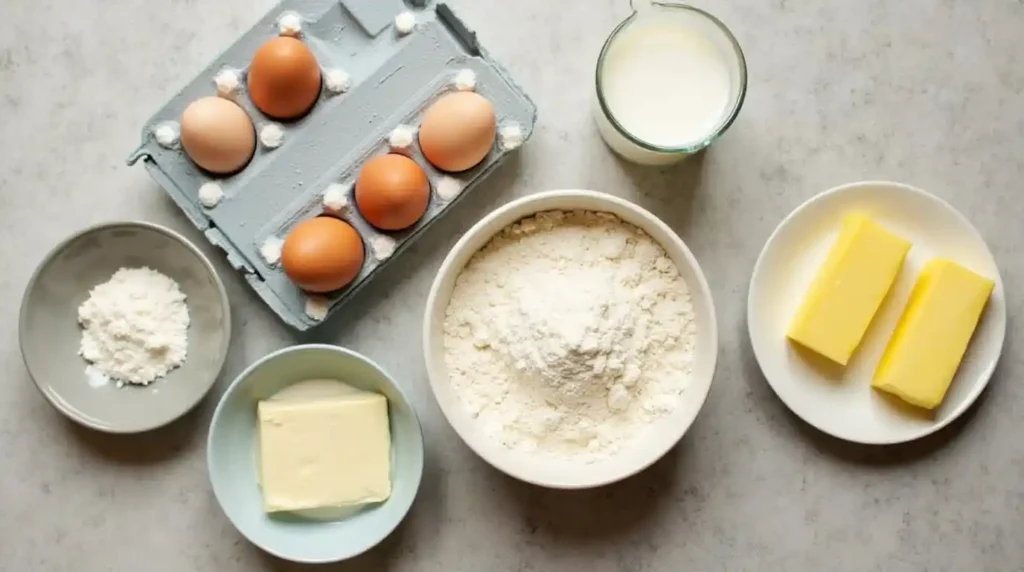
At its core, a classic Dutch Baby is made with flour, eggs, milk, and butter. This minimalist ingredient list is the foundation of the dish’s charm. These staples combine to form a batter that transforms in the oven into an airy, cloud-like pancake with crispy edges and a tender center.
Using pantry staples makes this recipe accessible, while their interplay creates the delicate balance of texture and taste that defines the Dutch Baby. Whether you’re making a sweet or savory version, these ingredients remain constant, allowing endless customization.
Choosing the Right Flour for the Perfect Texture
Flour is the backbone of the batter, providing structure and stability. For a traditional Dutch Baby, all-purpose flour is the most commonly used and yields a smooth batter with a slightly chewy interior.
For a lighter texture, consider incorporating cake flour, which has a lower protein content. Conversely, whole wheat flour adds a nutty depth of flavor but may result in a denser pancake. Whichever flour you choose, sifting it before mixing ensures a lump-free batter and promotes an even rise.
Why Whole Milk Adds Richness and Flavor
Whole milk is more than just a liquid binder—it’s a critical component that imparts richness and creaminess to the batter. The fat content in whole milk contributes to the Dutch Baby’s velvety texture, while its natural sugars enhance the dish’s subtle sweetness.
For those seeking alternatives, options like almond milk or oat milk can work, though they may slightly alter the texture and flavor. The key is to maintain a balanced liquid-to-flour ratio to ensure the batter remains pourable yet substantial.
The Role of Eggs in Achieving a Fluffy Dutch Baby
Eggs are the heart of a Dutch Baby, responsible for its dramatic puff and custard-like consistency. The high egg-to-flour ratio is what distinguishes this dish from traditional pancakes.
When beaten thoroughly, eggs incorporate air into the batter, which expands in the oven’s heat, creating the dish’s signature rise. Using fresh, room-temperature eggs is crucial, as they whisk more easily and blend seamlessly with the other ingredients, ensuring a uniform texture.
Butter: The Secret to a Golden, Crispy Edge
Butter serves a dual purpose in the Dutch Baby recipe. Melted butter adds richness to the batter, while a generous layer in the preheated pan creates the crisp, caramelized edges that are a hallmark of this dish.
Unsalted butter is often preferred for its purity, allowing the cook to control the seasoning. If you’re aiming for a savory Dutch Baby, browning the butter slightly before adding the batter imparts a nutty aroma that elevates the flavor profile.
Optional Sweeteners to Enhance Your Dutch Baby
While the basic Dutch Baby batter is neutral, incorporating a touch of sweetness can amplify its appeal. Granulated sugar or powdered sugar blends effortlessly into the batter, adding just enough sweetness without overwhelming the dish.
For a more complex flavor, try using honey, maple syrup, or vanilla extract. These natural sweeteners not only enhance the taste but also pair beautifully with toppings like fresh berries, citrus zest, or spiced syrups. Adjust the amount of sweetener based on your intended toppings, ensuring the final dish strikes the perfect balance.
Mastering these ingredient choices ensures every Dutch Baby you bake is a triumph of texture, taste, and visual appeal. With the right foundation, this versatile dish becomes a canvas for endless culinary creativity.
Equipment Needed
The key to mastering a Dutch Baby lies not only in the ingredients but also in the tools you use to prepare it. While the dish itself is relatively simple, the right equipment can make all the difference in achieving the perfect puff, golden crust, and tender interior. Here’s a detailed breakdown of what you’ll need and why each piece is essential.
The Best Type of Pan for Dutch Baby Perfection
The pan you choose can define the outcome of your Dutch Baby. A heavy, oven-safe skillet, such as a cast-iron pan, is the gold standard. Cast iron retains heat exceptionally well, ensuring an even bake and promoting the dramatic rise that gives a Dutch Baby its signature appearance.
Alternatively, an ovenproof non-stick skillet or stainless-steel pan can work, though they may not deliver the same level of crispness as cast iron. Choose a pan that is between 10 to 12 inches in diameter. A smaller pan results in a thicker Dutch Baby, while a larger pan produces thinner, crispier edges.
For a visually stunning presentation, consider a ceramic or enameled pan. While these don’t conduct heat as efficiently, their aesthetic appeal can elevate the dining experience.
Preheating Your Oven for Ideal Results
Preheating is an essential step that should never be overlooked. To achieve the Dutch Baby’s lofty puff and crispy edges, both the oven and the pan must be adequately heated before the batter is added.
Set your oven to 425°F (220°C) and allow it to preheat for at least 15 minutes. Place your skillet or pan inside the oven during this time. This ensures the pan is scorching hot when the batter is poured in, which triggers the immediate rise and creates the desired texture.
A thermometer can be invaluable for confirming your oven’s accuracy, as even slight temperature variations can affect the final result.
Using a Blender vs. Mixing by Hand
The method you use to combine the batter ingredients can influence the texture of your Dutch Baby. A blender is a popular choice for its speed and ability to create a silky-smooth batter. The high-speed blending aerates the eggs and integrates the ingredients thoroughly, contributing to a more uniform rise.
For those who prefer a more traditional approach, mixing by hand with a whisk is perfectly acceptable. This method offers more control and reduces the risk of overmixing, which can lead to a dense Dutch Baby. However, hand-mixing may leave small lumps in the batter, so whisk vigorously to achieve a smooth consistency.
Comparison Table: Blender vs. Hand Mixing
| Feature | Blender | Hand Mixing |
|---|---|---|
| Speed | Very fast | Slower, requires more effort |
| Texture | Ultra-smooth, lump-free | May have minor lumps |
| Aeration | Excellent for incorporating air | Moderate, depends on whisking effort |
| Ease of Use | Requires power, minimal manual effort | Fully manual, no electricity needed |
| Clean-Up | Multiple parts to wash | Simple, usually just one bowl and whisk |
With the proper equipment and attention to detail, creating a flawless Dutch Baby becomes an effortless and rewarding process. The right pan, oven preheating, and blending technique combine to produce a dish that is not only visually impressive but also irresistibly delicious.
Step-by-Step Instructions
Making a Dutch Baby is a delightful process that combines simplicity with a touch of culinary artistry. By following these detailed steps, you’ll transform a few basic ingredients into an airy, golden masterpiece that’s perfect for any occasion. Each step plays a crucial role in ensuring the dish’s signature puff and irresistible texture.
Preparing the Batter: Line by Line Breakdown
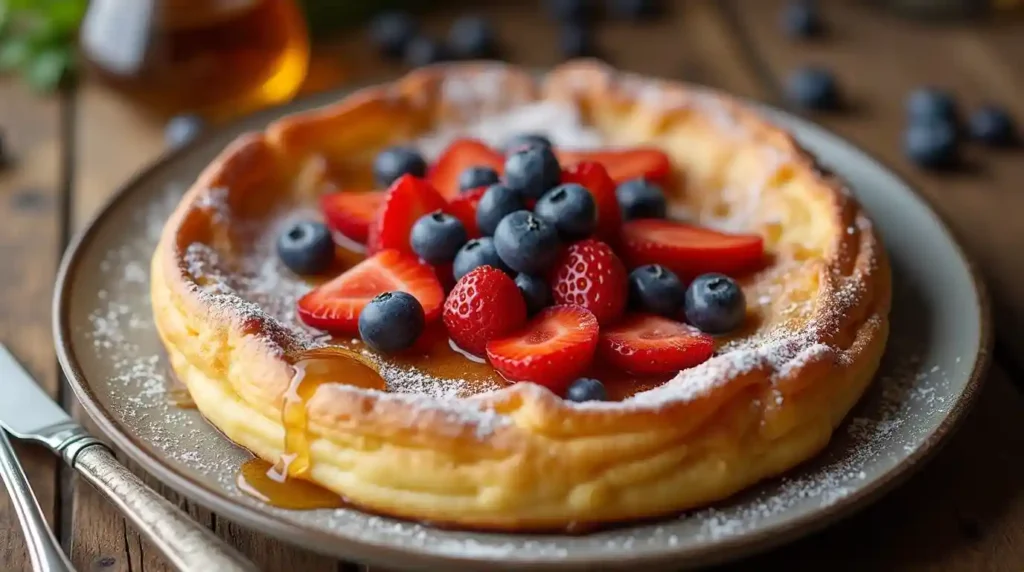
- Gather your ingredients: Ensure you have eggs, flour, whole milk, melted butter, and a pinch of salt at room temperature. Room-temperature ingredients blend more smoothly and encourage even rising.
- Crack three large eggs into a mixing bowl: Use fresh eggs for the best structure and flavor. Whisk them vigorously until the yolks and whites are fully combined.
- Add ½ cup of whole milk: Slowly pour in the milk while continuing to whisk, creating a uniform mixture.
- Incorporate ½ cup of all-purpose flour: Gradually sift the flour into the bowl to prevent lumps. Whisk until the batter is smooth and free of clumps.
- Mix in 1 tablespoon of melted butter: Add the butter to enhance richness and create a silky texture.
- Season with a pinch of salt: This balances the flavors and accentuates the Dutch Baby’s natural sweetness or savory toppings.
Preheating the Pan: Why It Matters
- Choose an oven-safe skillet: A 10- or 12-inch cast-iron skillet is ideal for evenly distributed heat.
- Preheat your oven to 425°F (220°C): Allow the oven to heat fully, ensuring consistent baking conditions.
- Place the skillet in the oven as it heats: Preheating the pan ensures the batter begins cooking immediately upon contact, promoting a dramatic rise and crispy edges.
Pouring the Batter for Even Cooking
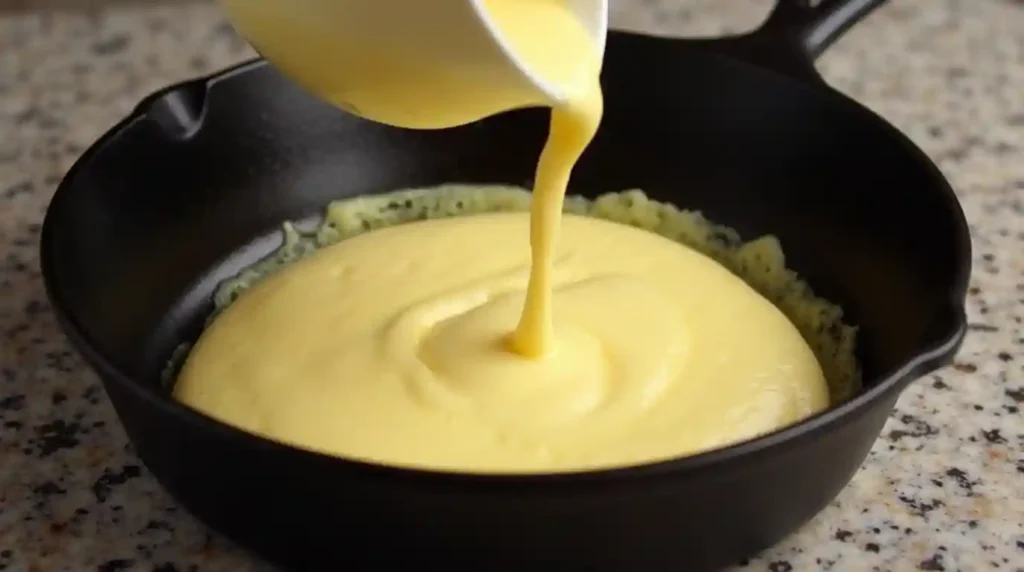
- Carefully remove the hot skillet from the oven: Use oven mitts to avoid burns, as the pan will be extremely hot.
- Add a tablespoon of butter to the skillet: Swirl it around until it melts and coats the bottom and sides. This prevents sticking and adds flavor.
- Pour the prepared batter into the center of the skillet: Allow it to spread naturally without stirring to maintain an even thickness.
Baking: Watching for the Perfect Puff
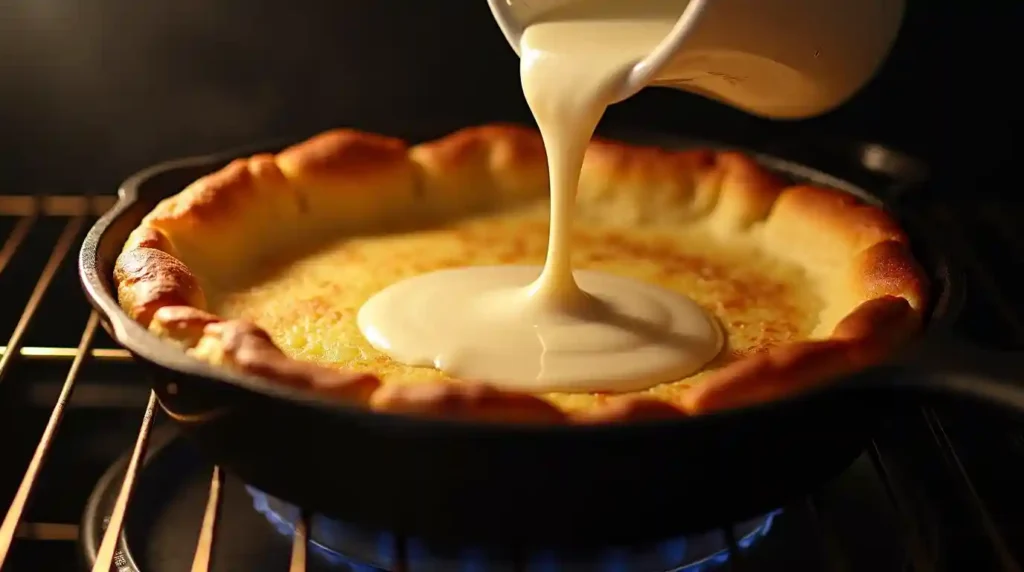
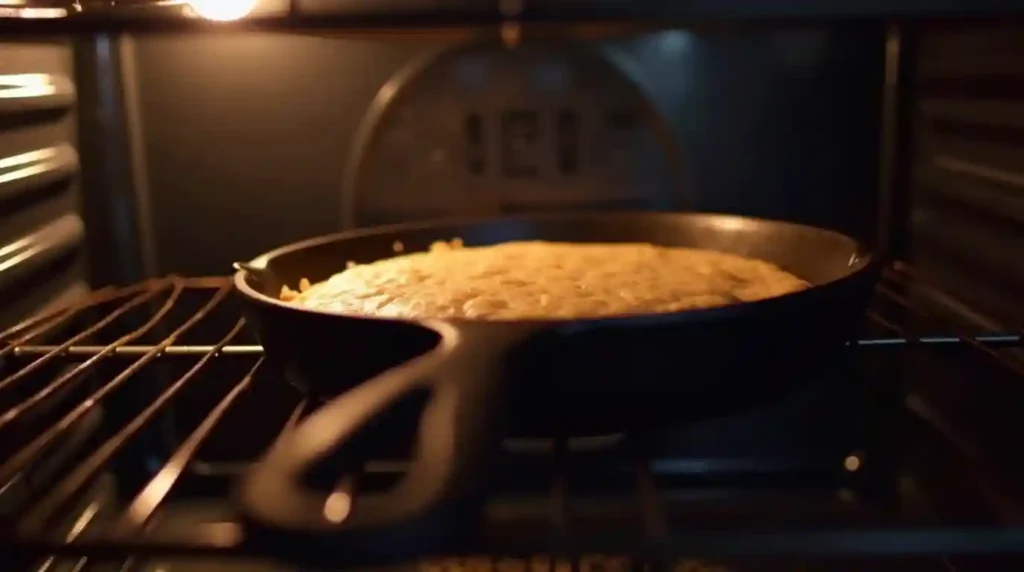
- Place the skillet back into the oven: Position it on the middle rack to ensure even heat circulation.
- Bake for 20-25 minutes: Avoid opening the oven door during the first 15 minutes to prevent the sudden loss of heat, which can affect the puff.
- Observe the Dutch Baby as it bakes: The edges will rise dramatically, forming golden, crispy peaks, while the center remains soft and custard-like.
Timing the Dutch Baby for Optimal Fluffiness
- Check for doneness: When the Dutch Baby’s edges are deep golden brown and the center is set but slightly soft, it’s ready.
- Remove from the oven: Carefully transfer the skillet to a heatproof surface.
- Serve immediately: A Dutch Baby is best enjoyed fresh out of the oven, as it will naturally deflate slightly as it cools.
By following these precise steps, you’ll create a Dutch Baby with perfectly puffed edges, a tender center, and an irresistibly golden crust. Each detail ensures your dish is not only visually stunning but also deliciously satisfying.
Tips and Tricks for Success
Creating a flawless Dutch Baby is both an art and a science. While the recipe is simple, a few missteps can prevent it from achieving its signature puff and golden perfection. With these tips and tricks, you’ll master the process and elevate your Dutch Baby game to new heights.
Common Mistakes to Avoid When Making a Dutch Baby
- Skipping the preheat: A cold pan or oven is a surefire way to sabotage your Dutch Baby. Without adequate heat, the batter won’t puff up as it should, and the texture will lack crispness. Always preheat both the oven and your skillet thoroughly.
- Overmixing the batter: While it’s essential to have a smooth batter, overmixing can develop excess gluten, resulting in a dense Dutch Baby. Whisk just enough to combine the ingredients and remove lumps.
- Using cold ingredients: Eggs, milk, and butter should all be at room temperature. Cold ingredients can hinder the batter’s ability to rise properly.
- Opening the oven door too soon: The Dutch Baby’s puff depends on consistent oven temperature. Avoid the temptation to peek inside during the first 15 minutes of baking.
- Incorrect pan size: Using a pan that’s too small or too large can affect the thickness and texture of your Dutch Baby. Stick to a 10- to 12-inch skillet for optimal results.
How to Prevent a Flat Dutch Baby
- Ensure a hot skillet: The key to a dramatic puff is pouring the batter into a sizzling hot pan. The instant contact with heat helps the edges rise and crisp.
- Incorporate enough air into the batter: Whisk or blend the eggs thoroughly to incorporate air, which helps the Dutch Baby rise. For an extra boost, let the batter rest for 10-15 minutes before pouring it into the pan.
- Avoid overcrowding the oven: If baking multiple dishes simultaneously, ensure there’s enough room around the Dutch Baby for proper heat circulation.
- Use the right flour-to-liquid ratio: Too much flour or not enough liquid can weigh down the batter. Stick to the recommended measurements for a perfectly balanced consistency.
- Serve immediately: A Dutch Baby will naturally deflate as it cools, so present it fresh out of the oven to enjoy its full puff and texture.
Tips for Customizing Flavor to Suit Your Taste
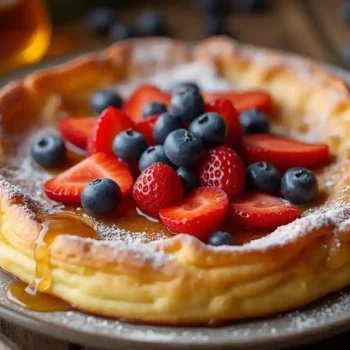
- Sweet variations: For a dessert-like Dutch Baby, add a teaspoon of vanilla extract and a pinch of cinnamon or nutmeg to the batter. Top with powdered sugar, fresh berries, or a drizzle of honey for an indulgent treat.
- Savory options: Transform your Dutch Baby into a savory masterpiece by omitting the sugar and adding herbs like thyme, rosemary, or chives. Top with smoked salmon, sautéed mushrooms, or a sprinkle of grated Parmesan.
- Citrus accents: Brighten your Dutch Baby by zesting lemon or orange into the batter. Serve with a dollop of citrus-infused whipped cream for a refreshing twist.
- Seasonal inspiration: Customize your Dutch Baby to reflect the season. Think pumpkin puree and spices in the fall, or fresh peaches and cream in the summer.
- Texture boosters: Add a handful of chopped nuts, shredded coconut, or chocolate chips to the batter for a unique spin on this classic dish.
With these expert tips, you can avoid common pitfalls and experiment with exciting flavors to create a Dutch Baby that’s uniquely your own. From its dramatic rise to its versatile toppings, each step of the process is an opportunity to delight your taste buds and impress your guests.
Creative Variations
A Dutch Baby: A Fluffy, Sweet Start to the Day is a blank canvas, inviting endless possibilities for creative flavors and toppings. Whether you lean towards the sweet or savory spectrum, or prefer flavors that reflect the changing seasons, this versatile dish offers something for every palate. Here are some inspired ways to elevate your Dutch Baby and make it a standout at any meal.
Sweet Toppings: From Powdered Sugar to Fresh Fruit
The sweet allure of a Dutch Baby: A Fluffy, Sweet Start to the Day lies in its adaptability to indulgent toppings.
- Classic powdered sugar: A light dusting of powdered sugar is the quintessential finishing touch. It adds a delicate sweetness and a touch of elegance to your Dutch Baby.
- Fresh fruit medleys: Seasonal fruits like strawberries, blueberries, raspberries, or slices of kiwi bring a burst of freshness. Arrange them artfully for visual appeal.
- Caramelized bananas: Sauté banana slices in butter and brown sugar until golden and sticky. The caramel notes pair beautifully with the Dutch Baby’s fluffy texture.
- Decadent syrups: Drizzle maple syrup, honey, or even a rich chocolate sauce over your Dutch Baby for an extra layer of indulgence.
- Whipped cream or mascarpone: A dollop of freshly whipped cream or a smear of lightly sweetened mascarpone elevates the dessert-like quality of your dish.
Savory Twists: Cheese, Herbs, and Veggies
While Dutch Baby: A Fluffy, Sweet Start to the Day often leans sweet, a savory version can be equally delightful.
- Cheesy delight: Sprinkle grated Gruyère, cheddar, or Parmesan into the batter before baking. Alternatively, melt your cheese topping during the final minutes in the oven for a gooey, golden crust.
- Herbaceous flavors: Incorporate fresh herbs like rosemary, thyme, or chives into the batter or sprinkle them on top after baking for a fragrant, earthy twist.
- Veggie toppings: Sautéed mushrooms, caramelized onions, or roasted cherry tomatoes can turn your Dutch Baby into a hearty brunch or dinner option.
- Protein boost: Add cooked bacon, smoked salmon, or poached eggs for a more filling and savory take on this classic dish.
- Spiced variations: A sprinkle of za’atar, smoked paprika, or crushed red pepper can add complexity and depth to your savory Dutch Baby.
Seasonal Ideas: Pumpkin Spice, Berry Medleys, and More
Celebrate the changing seasons with a Dutch Baby: A Fluffy, Sweet Start to the Day tailored to the flavors of the moment.
- Autumnal pumpkin spice: Blend pumpkin puree, cinnamon, nutmeg, and cloves into the batter. Top with whipped cream and a sprinkle of cinnamon sugar for a festive fall treat.
- Summer berry medleys: Use a combination of blackberries, blueberries, and raspberries. Macerate them with a touch of sugar and lemon juice to create a juicy topping.
- Winter citrus: Zest oranges, lemons, or grapefruits into the batter and serve with a drizzle of citrus glaze. The bright, tangy flavors offer a refreshing contrast to cold-weather dishes.
- Spring florals: Infuse your batter with a hint of lavender or rose water. Garnish with edible flowers and honey for a delicate, floral note.
- Holiday-inspired twists: Add crushed candy canes or a drizzle of eggnog glaze for a festive holiday Dutch Baby that’s sure to impress.
With these creative variations, a Dutch Baby: A Fluffy, Sweet Start to the Day becomes more than just a meal—it’s a culinary adventure. Sweet or savory, simple or elaborate, this versatile dish allows you to experiment and personalize it to suit your taste, the season, or the occasion.
Serving Suggestions
How to Present Your Dutch Baby for a Wow Factor
Perfect Pairings: Coffees, Teas, and Juices
Making It a Meal: Complementary Side Dishes
FAQs About Dutch Babies
What is the science behind Dutch baby?
The science behind Dutch Babies lies in the interaction between eggs, flour, and milk. As the batter bakes, the high heat causes steam to form, creating a dramatic rise. The result is a light, airy texture with crispy edges.
What does a Dutch baby taste like?
Dutch Babies offer a delicate balance of sweetness and richness. The crispy edges provide a slight caramelized flavor, while the center remains soft and custard-like, with a light, airy texture that’s subtly buttery and satisfying.
Why do they call it a Dutch baby?
The name Dutch Babies is believed to stem from a misinterpretation of “Deutsch” (German), as early recipes were inspired by German pancakes. The dish’s unique, puffed texture and appearance led to its charming, distinctive name.
What makes Dutch babies rise?
The rise of Dutch Babies is due to the combination of high heat and the liquid batter. As the eggs and milk cook, steam forms, creating an airy, puffed texture with crispy edges and a tender center.
Why did my Dutch baby collapse?
A collapsed Dutch Baby could result from several factors, such as opening the oven door prematurely or not preheating the pan sufficiently. A lack of steam or overmixing the batter can also hinder its rise, leading to deflation.
How do the Dutch raise their children?
The question of how the Dutch raise their children is separate from the culinary delight of Dutch Babies. However, the Dutch are known for their practical, independent, and supportive parenting style, emphasizing freedom within boundaries and open communication.
Dutch Babies
Ingredients
- ½ cup (120g) all-purpose flour
- ½ cup 120ml) whole milk
- 2 large eggs
- 2 tbsp (28g) unsalted butter
- 1 tbsp (12g) granulated sugar (optional for sweetness)
- ¼ tsp salt
- 1 tsp vanilla extract (optional)
Instructions
- Preheat your oven to 425°F (220°C).
- Place a 10- or 12-inch cast-iron skillet in the oven while it heats.
- In a blender, combine flour, milk, eggs, sugar (if using), and salt. Blend until smooth.
- Once the oven and skillet are preheated, carefully remove the skillet and add butter, swirling it until melted.
- Pour the batter into the skillet and return it to the oven.
- Bake for 20-25 minutes, or until the edges are golden and puffed.
- Remove from the oven and serve immediately with desired toppings.
Notes
- Dutch Babies should be served immediately, as they may deflate slightly once they cool.
- Customize with toppings like fresh fruit, powdered sugar, syrup, or sautéed vegetables for a savory version.
- Be cautious not to open the oven during the first 15 minutes of baking to maintain the rise.
Conclusion
The allure of Dutch Babies lies in their unique combination of simplicity and elegance. This dish stands as the ultimate breakfast treat—crispy on the edges, soft in the center, and endlessly adaptable to both sweet and savory tastes. The ability to customize your Dutch Babies with a variety of toppings and fillings makes them a perfect choice for any palate. Whether you enjoy them drizzled with syrup, adorned with fresh fruits, or loaded with savory ingredients like cheese and herbs, these fluffy wonders never fail to impress.
What’s even better? Making your own Dutch Babies is easier than it seems. The process is quick, the ingredients are simple, and the results are absolutely worth it. If you’re looking for more breakfast inspiration, check out this delightful pancake breakfast recipe, which adds another layer of variety to your morning routine.
Take the plunge and try your hand at creating Dutch Babies today. You’ll be amazed at how such a straightforward dish can bring so much joy and satisfaction to your table. For additional tips and inspiration, explore more recipes on this YouTube channel, where culinary creativity is always at the forefront.


