Perfectly Caramelized Bites Await
Perfectly caramelized:
Caramelization is one of the most magical transformations that food can undergo. It takes simple ingredients and, through heat, turns them into something complex, rich, and mouthwatering. Whether you’re drizzling caramel on a dessert or caramelizing vegetables for a savory dish, the process brings out natural sweetness and creates delightful flavors and textures.
In this article, we’ll explore everything you need to know about creating perfectly caramelized bites. From the science behind the technique to flavor experimentation and tips for making sure your caramelization is just right, you’ll soon be on your way to creating the best caramelized bites in your kitchen!
What Does It Mean to Have “Perfectly Caramelized” Bites?
The Science Behind Caramelization
Caramelization is the process of browning sugar, which occurs when sugar is heated to high temperatures. As the sugar molecules break down, they form new compounds, which add a rich, nutty, and sometimes slightly bitter flavor. The process is not just about the sweet taste—it also creates beautiful golden-brown hues and a glossy finish that make the food visually appealing.
When caramelizing foods, the key is to control the temperature carefully. Too high, and the sugar will burn; too low, and the full caramelization process won’t occur. The temperature range for caramelizing sugar typically sits between 320°F and 350°F (160°C to 175°C).
How to Tell When Caramelization is “Perfect”
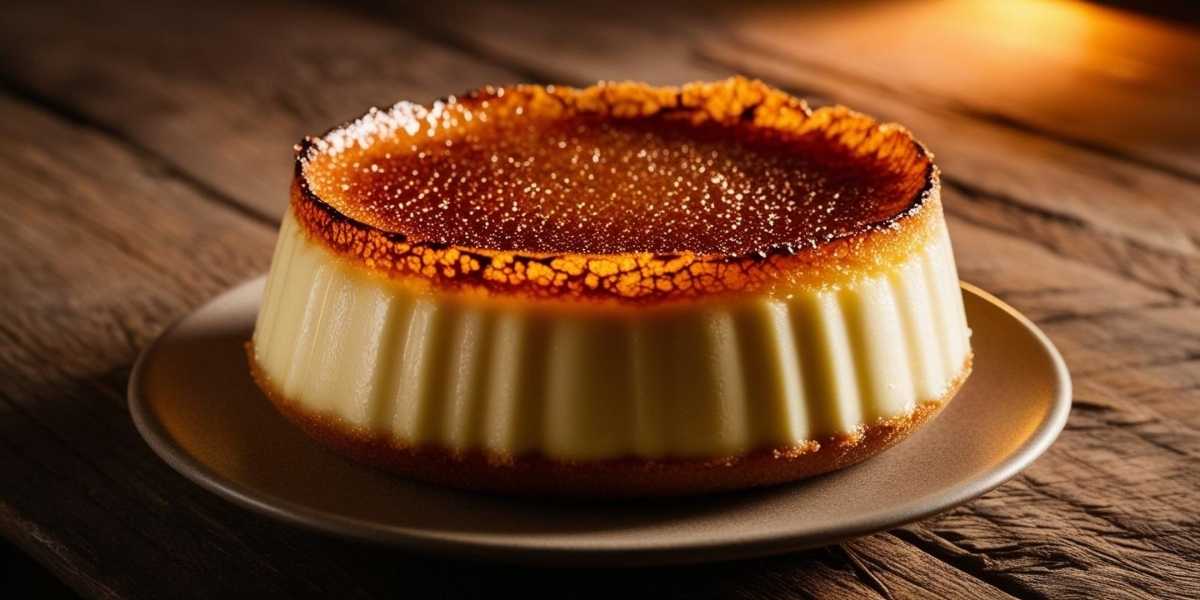
A perfectly caramelized bite should have a deep amber color and a slightly crispy texture. When you look at it, you should see a glossy sheen, and when you bite into it, you should experience a balanced crunch followed by a melt-in-your-mouth sweetness. The perfect caramelization strikes a balance between sweet, slightly bitter, and nutty flavors—without crossing into burnt territory.
The Best Foods for Caramelization
Vegetables That Caramelize Beautifully
While caramelization is often associated with sweet dishes, vegetables can also benefit from the process. Some vegetables, especially those with natural sugars like onions, carrots, and sweet potatoes, develop deep, rich flavors when caramelized. Onions are a classic example—when cooked low and slow, their natural sugars are drawn out, creating a sweet, jammy texture that complements many savory dishes.
Sweet potatoes, carrots, and bell peppers also caramelize wonderfully, bringing out a subtle sweetness that pairs beautifully with herbs and spices. The key to caramelizing vegetables is to cut them into uniform pieces, ensuring even cooking. Using a cast iron skillet or roasting them in the oven can help achieve a perfect caramelized finish.
Sweet Treats: Fruits and Sweets That Benefit from Caramelization
When it comes to desserts, caramelization takes flavors to the next level. Fruits like apples, pears, peaches, and bananas are excellent choices for caramelizing. The heat intensifies their sweetness, creating a lovely caramelized crust on the outside, while keeping the inside tender and juicy.
For an added touch of luxury, try caramelizing sugar on top of a crème brûlée or making a rich caramel sauce to drizzle over ice cream. The perfect caramelized fruit can be served on its own, incorporated into tarts, or added as a topping for cakes and ice creams.
Tips and Techniques for Perfect Caramelization
Control the Heat for Better Results
One of the most important factors in perfect caramelization is controlling the heat. Too high of a temperature can cause sugar to burn quickly, while too low can result in a slow process that may not develop the rich flavor we’re aiming for. When caramelizing sugar, it’s essential to start with medium heat, gradually adjusting as needed.
If you’re caramelizing vegetables or fruits, ensure that the pan is preheated and not overcrowded, as this allows the heat to distribute evenly. A good rule of thumb is to use a heavy-bottomed pan (like a cast iron skillet) to prevent hot spots and ensure an even caramelization.
Stirring and Timing for the Perfect Texture
Stirring is essential when caramelizing sugar to prevent burning. However, if you’re working with fruits or vegetables, you don’t want to stir them constantly. Instead, allow them to rest in the pan to develop that crispy caramelized edge, then gently turn them with tongs or a spatula. For sugar, once the sugar starts to melt, you can stir occasionally to keep it from burning.
Caramelization should be done at a moderate pace. Don’t rush it! Allow your ingredients to take their time, as this helps develop the full depth of flavor. Caramelization is about patience, as it gives the sugars time to break down and create that perfect crispy yet gooey texture.
A Journey Back in Time: The Origin of Crème Brûlée
Crème brûlée is more than just a dessert—it’s a culinary heritage. This legendary dish, combining simple ingredients with precise techniques, has left its mark on gastronomic history.
- First Written Record: The recipe first appeared in 1691 in Le Cuisinier Royal et Bourgeois by François Massialot, a French chef who served nobility.
- Original Name: Initially called “crème anglaise” before adopting its current name.
How Did Crème Brûlée Spread?
Although its roots are French, similar variations emerged in other countries:
- Spain: Crema catalana, a citrus- and cinnamon-infused cream, is often considered its Spanish cousin.
- England: In the 17th century, Trinity Cream was served at Trinity College, Cambridge, featuring fresh cream and a distinctive burnt topping design.
Key Ingredients for Perfectly Caramelized Bites:
The Essentials for Caramelization

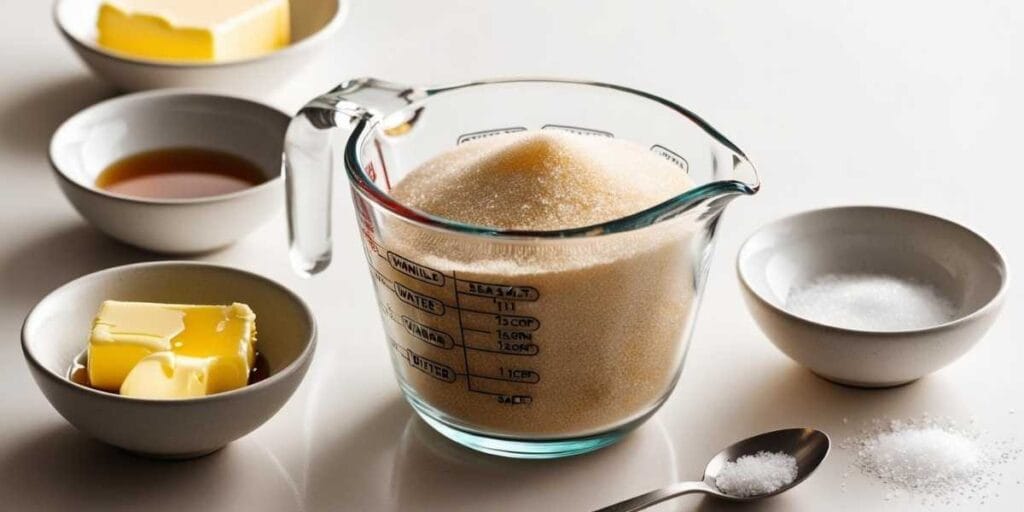
To create the perfect caramelized bites, you’ll need just a few simple ingredients. Whether you’re caramelizing fruits or even cake, these are the basic ingredients you’ll need to get started:
- 1 cup granulated sugar: The primary ingredient for caramelization. It’s the sugar that will break down and develop the rich caramel flavor and color.
- 2 tablespoons water: Added to the sugar to help it dissolve and begin the caramelization process. It also prevents the sugar from burning too quickly.
- 1 tablespoon butter: Butter adds richness and helps to create that smooth, glossy caramel texture.
- 1/2 teaspoon vanilla extract: For a warm, aromatic flavor that enhances the sweetness of the caramel.
- A pinch of sea salt (optional): A subtle salty twist to balance the sweetness and create a more complex flavor profile.
Instructions:
- Prepare the sugar mixture: In a medium saucepan, combine the granulated sugar and water. Stir gently to dissolve the sugar over medium heat.
- Caramelize the sugar: Once the sugar has dissolved, stop stirring and allow it to simmer. Let the sugar cook for 8-10 minutes, or until it turns a golden amber color. Keep a close eye on it to prevent burning.
- Add butter and vanilla: Once the sugar has reached the desired color, add the butter and vanilla extract. Stir until the butter is fully incorporated, and the caramel becomes smooth.
- Prepare your bites: While the caramel is cooking, slice your fruit or cake into bite-sized pieces. For fruit, make sure it’s ripe but firm to hold its shape when caramelized. If you’re using cake, lightly toast the pieces for a bit of crunch.
- Caramelize the bites: Once your caramel sauce is ready, dip the fruit or cake pieces into the caramel sauce, coating them evenly. Let the caramelized bites rest on parchment paper for a few minutes to harden.
- Optional topping: For an extra layer of flavor, sprinkle a pinch of sea salt on top of the caramelized bites for a delightful contrast between sweet and salty.
- Serve and enjoy! Once the caramel has set, serve your perfectly caramelized bites as a sweet treat, appetizer, or addition to your favorite dessert plate.
Flavor Experimentation Tips:
- Fruit variations: Try caramelizing different fruits such as strawberries, bananas, or pineapples. Each fruit brings its own sweetness and texture to the mix.
- Savory spin: Want to add a savory twist? Try caramelizing roasted vegetables like sweet potatoes or carrots. The caramelization enhances the natural sugars of the veggies for a savory-sweet treat.
- Herb-infused caramel: Experiment with adding herbs like rosemary or thyme to the caramel sauce for an aromatic touch.
- Toppings and garnishes: For added flavor and texture, drizzle with chocolate sauce, sprinkle with crushed nuts, or add a dusting of cinnamon or cocoa powder.
Tips for Making the Perfect Crème Brûlée
- Use Quality Ingredients: Full cream and fresh vanilla beans ensure authentic flavor.
- Master the Cooking Process: Bake slowly at a low temperature to prevent curdling.
- Caramelize Correctly: A blowtorch works best, but a preheated grill can also do the trick with patience.
What to Caramelize
You can caramelize a variety of ingredients to make your bites even more delicious! Here are a few suggestions:
- 1 cup fresh fruit: Apples, pears, peaches, or even bananas caramelize beautifully and pair perfectly with the sugar and butter mixture.
- Bite-sized pieces of cake: For a creative twist, try caramelizing small pieces of sponge cake or pound cake. These cake bites take on a crispy, golden exterior with a soft, moist interior—a decadent dessert or snack!
Why These Caramelized Bites Are Perfect for Any Occasion:
These caramelized bites are versatile, easy to make, and can be customized to suit any occasion. Whether you’re hosting a dinner party, preparing a quick treat, or just indulging in something sweet, they provide a perfect balance of crispy caramel and tender fruit or cake. The slight bitterness of the caramel complements the sweetness of the fruit or cake, creating a delightful contrast that is sure to impress your guests or satisfy your sweet tooth.s a symbol of refinement. With its adaptable recipe, it continues to captivate dessert enthusiasts everywhere.
The best part? You can play with flavors and textures, making it easy to create a treat that’s uniquely yours. So, what are you waiting for? Let these perfectly caramelized bites elevate your culinary creations today!
